Tuesday, August 17, 2010

Braised Cucumbers- Not All They're Cracked Up To Be.

Ok, I saw Julie and Julia, I'm sure I've mentioned this before because I absolutely loved it. Now, in that movie I distinctly remember Julie saying "braised cucumbers are a revelation".

So, for some reason I got it in my head this week that I was going to make them. I had a cucumber, why not! When I googled it, I realized that not only had half of the people writing food blogs had the same idea I did, but that I was also pretty late to the party. And, as I read, things came up like "heaven on a plate" and "amazing" and "a classic". I have to say, I don't know WHAT these people are thinking.

This was not the grossest thing I've ever made- that prize goes to the Dulce de Leche I screwed up a while back (newly filed in my growing "disasters" category). But, it was, lets just say, not good.

Here is what everyone says to do....

1 big cucumber (or 2 regular sized)
1 tbsp butter
1 dash salt
1 tsp lemon juice
1 pinch dried mint
squeeze lemon juice

Peel cucumber, cut into quarters and remove seeds. Then, cut it into 1 inch pieces (note: mine were bigger. I have no even remote inkling that cutting them smaller would have helped). Melt butter (note: I used Earth Balance. it does make them vegan, which only matters if you actually eat them. I don't think butter would have saved these things, I really don't) in a pan and add the cucumber. Cover and cook about 10 minutes on medium heat. Stir in salt, lemon, and mint. Cover and cook another 2 minutes.

 Looks so promising, right? At this point I was wildly optimistic and fantasizing about this becoming my new secret recipe.

 Now, I'm not even going to TELL you about the chicken, which was a mediocre mustard crusted chicken tender concoction. I will tell you about the cucumbers, but let me tell you- I ate the mediocre chicken (hey, a girls gotta eat something, and everything can't be perfect), and I only ate 2 cucumbers (one to see how it tasted, another to verify, and the rest weren't long for this world).

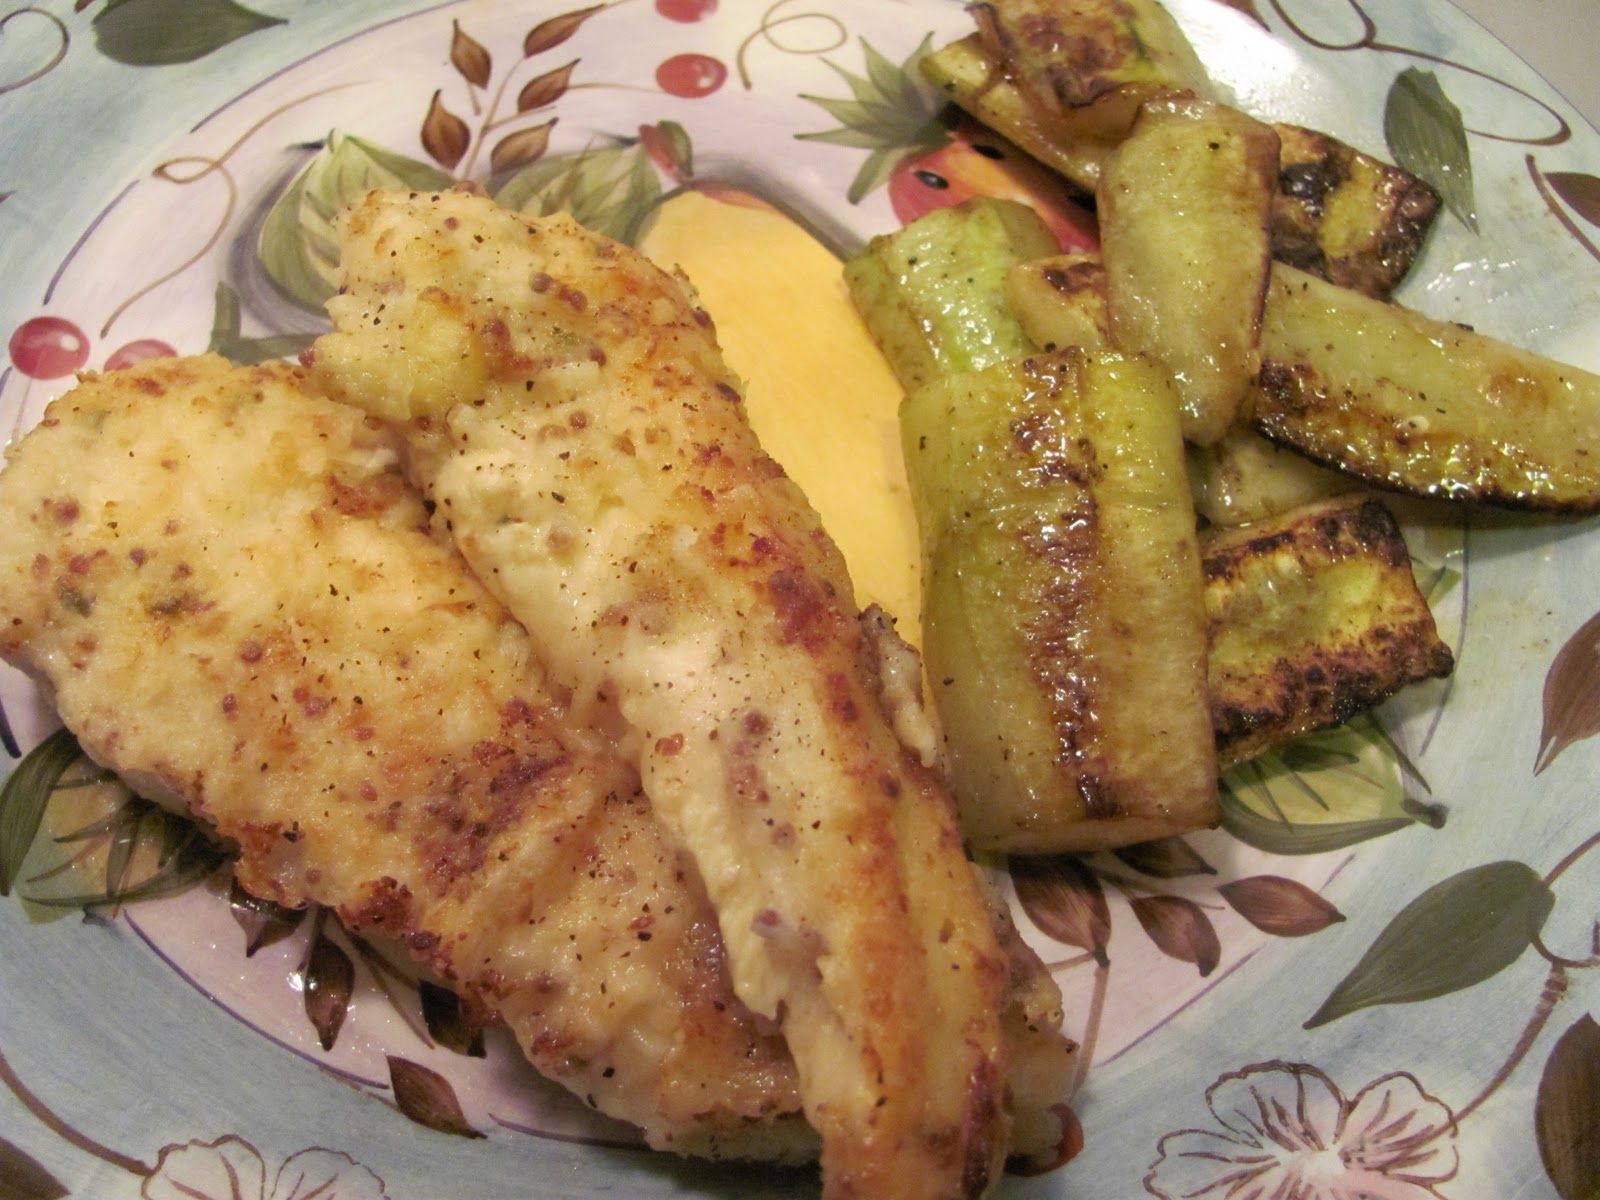
They tasted like hot soggy cucumbers. That is all. They weren't transformed, they weren't magical, they were exactly what they sound like if you imagine slowly cooking a cucumber. Sadly, they are not my new secret recipe, to say the least.

To rescue this, if you want my ACTUAL favorite cucumber recipe, it is super easy, and here you go: very thinly slice one large English cucumber. Sprinkle on either seasoned rice vinegar and salt and pepper OR seasoned rice vinegar, a little sesame oil, and red pepper flakes. That on is good, I swear.

Saturday, August 14, 2010

Another Experiment... Upside Down Peppers!

These days it has gotten very trendy to grow plants upside down- mainly tomatoes, but other things as well such a strawberries and peppers. Theoretically, plants grown this way are less vulnerable to pests and are super healthy. I was only somewhat intrigued by this until I found out that you could make your own upside down planter with just a bottle! Then, obviously, I had to try it.

My bottle of choice was a 3 liter water bottle- partly because it was 3 liters instead of 2 and partly because I didn't want to drink 2 liters of soda before embarking on my project. I painted it, which is important so that any roots don't get burnt by the sun coming through clear plastic. Then I cut off the bottom.
Next, I poked four holes, one on each quadrant of the bottom of the bottle. Through those holes, I ultimately stuck chopsticks, making an X pattern (see below). First, I fed the plant out through the small hole in the top of the bottle. Then, I carefully filled it with dirt around the existing roots. I then tied twine around the end of the chopsticks, to create something to hang the pot from.
One tip, is that I quickly realized that the hole in the top of the bottle (now the bottom) where the plant comes out, was way too big. I wasn't sure what to do so ended up created a little net of twine to keep everything inside. Its not pretty, but it works! I think with a 2 L bottle that has a smaller opening, this would not be an issue. See how cute it is? (the ball in the top is one of those water globe things).
Now for the experiment. Obviously, I couldn't just plant the one crazy upside down plant without a control group, because I'd never find out if that method really is better. So, the other plants that had come in the container went straight up, just like normal (for some reason they only had really long tall plants left, as you can see).
What is the verdict? Well, the right side up plants are producing actual peppers by now, and the upside down one is only just getting blooms. The upside down one is also exceptionally hard to keep watered. So, in terms of productivity, the normal plants have it. In terms of being completely fascinating? Hands down it goes to the upside down one. Check it out....

From the very first day, the leaves started to slowly turn upwards towards the sun (ever wonder why this happens? It is so interesting... basically, the leaves need to maximize the sun exposure, and the way they do it is that the plant cells that are in the shade start to elongate relative to the cells on the sunny side, and having the longer cells concentrated on one side causes the plant to bend. pretty clever, right?)


Not only are the leaves now completely turned upwards, the upside down plant is also grown a much larger percentage of new leaves close to the base of the plant than the right side up plant is (which makes sense). It hasn't managed to produce any fruit, but maybe that makes sense given how much extra work it has to do! Either way, I'm rooting for it!

Wednesday, August 11, 2010

Massive Excitement- Home Grown Stuffed Peppers!

Ok, this is just about the most exciting thing I've ever posted about (well, to me). It is the culmination of all my gardening and cooking posts, in which I actually get to cook with something from the garden (the lemon cucumbers only kind of count, because they weren't from my garden).

First, check out the first harvest! (while I was on vacation some of the banana peppers turned red!)

Here we have small hot red chilis, jalapenos, and banana peppers

Now! what to make, what to make. I wanted to make a healthier version of chile rellenos, and ended up with something inspired by this Rachel Ray recipe (I've actually had the original recipe, and it is absolutely fantastic as written, but, I didn't have corn, and wanted a little more protein).

The first thing I did was put the peppers I was using in the oven under the broiler. 

Once they were roasted, I split them open.

Then I made a little filling. I browned half an onion, one of MY JALAPENOS (!)  tossed in a very very well rinsed and drained can of black beans, and some cheese (my ever favorite TJ's Quattro Formaggio), and about a quarter of a bunch of cilantro, chopped.

I then spooned it onto the peppers, and sprinkled them with a bit more cheese. I cooked them in the oven at 375 until nicely browned.
See? Delicious!

Whats that green stuff next to it, you ask? Why, that is Green Quinoa, which you will be hearing about shortly!

Sunday, August 8, 2010

Cherry Walnut Spinach with Israeli Couscous

This is an interesting dish, it could be a side dish, or you could serve it over rice or pasta. I chose Israeli Couscous. If you haven't had this, #1 it means that you haven't had my Rosemary Couscous Chickpea Salad, and I'm going to tell you right now that means you are missing out. It is very different than regular couscous (which I also love)- its more like little balls, and has a really fun unique texture.

 What you need...
.25 cup dried cherries
.25 cup chopped walnuts
.5 onion
about 3 garlic cloves, chopped
10oz fresh spinach (baby, probably is best)
olive oil
a splash of chicken/veggie broth, white wine, or more oil
.5 -2/3 cup dry couscous
2oz soft cheese (goat cheese, feta would be best)

What to do with it...
First, start the couscous. Heat up a few teaspoons of oil in a sauce pan and lightly toast the couscous. I made .5 cup for a light dinner that served 2, if you're hungrier, make more. Once its getting brown, put in twice as much water as you had put in couscous, cover, and lightly simmer.

Now, start with the topping. First, heat a few teaspoons of onion and brown the garlic and the onion. Once the onion is about halfway done (so, sort of getting soft, but not brown), toss in the walnuts and the cherries. The walnuts will toast a bit, and the cherries soften and plump up. I put my cherries in right when I put in the onions, and I think they were a bit overcooked.
Now, dump in about half a cup of broth, and let it cook for a minute to get hot and start steaming, then throw in the spinach. If you're making this as a side dish for a bunch of people, put in more- there enough of the onion/cherry/walnut mixture that you could probably have almost twice as much spinach if you wanted. I never cease to be amazed at how much spinach shrinks up.

Once its all cooked toss in the crumbled cheese. Now, I had on my hands some super delicious soft cheese from the kind of friends who come and stay and leave the fridge stocked with multiple super delicious cheeses. Now, the thing is, I think that was a mistake. The original recipe called for goat cheese, and I think they were right- because, my cheese kind of melted away.

This was unique and tasty. I think mine would have been tastier with different cheese and less cooked cherries, but I will definitely be trying it again!


*note- this recipe would be veeeeery easy to make vegetarian (use veggie broth not chicken broth) or vegan (skip the cheese). you could even add small piece of firm tofu to add some protein.

Thursday, August 5, 2010

A Bit of Indian Flavor: Chicken Dopiaza

This recipe is tasty and pretty easy- the list of spices is long, but what actually needs to be done isn't all that complex.
Here's what you need...
3 tbsp oil
8 shallots, halved (pick small ones!)
3 dried red chilies
6 cardamom pods
6 black peppercorns
2 whole cloves
2 bay leaves
1 tsp garlic paste
1 tsp ginger paste (this is really useful to have on hand, by the way)
1 tsp cumin
1 tsp coriander
.5 tsp tumeric
1 tsp red pepper flakes
1 can canned chopped tomatoes
2 onions, finely chopped
.5 cup water
4 chicken breasts, cut into large chunks
a bunch cilantro
brown rice, cooked

See, I said it was long, but don't worry! here's what you do with it...
Very slowly cook the halved onions over low heat in 2 tbsp of the oil. They'll turn very soft and golden brown. Put them off to the side.

Now, put the rest of the oil in the pan, and cook the all spices until they are fragrant. This is one of the important tricks, you want to give the spices time to get moisturized in the oil and for the flavor to open up. Put the chopped onions in, cook slowly until soft (its important that they get very soft and brown and mix in with the spices), and then pour in the can of tomatoes (the whole can, with liquid). Simmer this mixture for about 5 minutes until thick. Pour in the water, and then place the chicken pieces in so that they can slowly simmer. When the chicken is approaching being done (how long this will take depends a lot on the size of your chunks), put in the browned half onions and let them simmer about 10 more minutes.

Right before serving, stir in the cilantro, and put it over brown rice. In the picture, you can see some corn, which I'll be posting about later!

Its good stuff... enjoy!

Monday, August 2, 2010

A dream realized... growing Loofahs!

A few years (YEARS, omg) ago, I posted about my newest fun fact, which is that loofahs are not in fact under water sponges or something equally mysterious, but are actually a fruit that grows on a vine! Once I found that out, I just had to grow them. Fortunately, given our recent container gardening success (and trust me you've only seen the tip of the iceberg on that), my co-gardener across the city surprised me with some loofah seeds! (which, as with everything these days, you can get on amazon).

I have no experience with seeds. All my other plants arrived as little baby plants from Home Depot. So, I was a little apprehensive. Ever the scientist, I decided to do an experiment. I took 6 seeds, and soaked them all overnight in a cup of water. 

I then took 3 seeds, and planted them in little pots of wet dirt. The other 3 I put between 2 layers of wet paper towel, inside of a little plastic container from Trader Joes (like veggies and salads come in), which I left outside like a greenhouse.

After a few days, the paper towel group clearly had little roots! Once the roots were pretty big, I planted each one in a little pot (I wanted the pots to be little so that when I moved them to the big pot, I could just take all the dirt along with them).

Actually though, in the end, they all sprouted. So, my fabulous experiment can't reveal any greater truths about seed germination. But do I care? Not at all. Because what do I have? A WHOLE LOTTA LOOFAH!
 It may be a bit late in the season (although California stays warm fairly late). And, I have no idea if it'll work, but oooooh boy, am I ever pumped up about this.

Sunday, August 1, 2010

And... I'm back!

Sorry for the few weeks of silence, but I've been off looking at things like this:
And hanging out with these two cuties...

And, currently I'm unpacking, and getting used to the idea that I have to check my email and (*gasp*) go to work. BUT, let me tell you do I ever have some exciting stuff saved up, so.. stay tuned!

LinkWithin

Related Posts with Thumbnails